Can you schedule blog posts on WordPress?
Of course, you can! This is one of the must-use features in WordPress especially if your website creates regular content. Many users when starting their blog don’t even notice that they can schedule their post.
With this feature, an article can be published on a future date and time. You can write an article at your suitable time that can be posted at a later date.
Does it sound useful to you?
If not you can stop reading the post right now. We will discuss how to schedule post on WordPress and what are the best practices followed by the bloggers during scheduling.
Why should you schedule posts?
You have a blog and you need to publish content at regular intervals as there is web traffic waiting to read your new articles. But, unfortunately someday if you can’t publish the content according to your calendar, what will happen?
Of course, there are persons expecting the new article. If so happens they get disappointed and you may even lose your potential customer as they may find some other blogs like you. It is not compulsory that you should publish content daily or weekly. But, your readers will be expecting new content depending on the activities on your blog.
In this case, to maintain a constant calendar and to be regular in publishing articles, scheduling content sounds necessary. You can create content earlier than the publishing date that can be scheduled to be posted on a future date. This way you will never get back or delayed to follow your content calendar.
If you have a blog, then you should definitely view the analytics of your blog. This helps you to analyze the time and day of the week when your blog is likely to have the most traffic or more traffic than average your site has. If your blog writer is from a different time zone and if your blog traffic is high at a different time then you have to manage the posting of the article according to the peak traffic of your site. If you follow this on a regular basis, then you will get a chance to improve the analytics too. This can be easily done if you know how to schedule post on WordPress.
Nobody works 365 days a year, there will be a vacation as well. If you know that the vacation time is coming then you can start creating more posts at an earlier date than the vacation that is enough for that period. Certainly, when the vacation starts, you can schedule the posts according to your content calendar and enjoy the vacation period. This helps you to look continuous at every time of the year and does not let your readers down expecting new content.
When you have multiple contents at an earlier date, you also get plenty of time to analyze them and add something extra before publishing if that is necessary. The content can be analyzed by the editor before publishing. This will definitely help to maintain the quality of your blog and helps you to rank high among your competitors in Google.
How to schedule post on WordPress?
If you know how to schedule post on WordPress, you can set the publication date for the content in advance.
Scheduling WordPress Posts takes only a few clicks after the content becomes ready. When your content becomes ready, you need to click the publish box that is present on the top right at the time of writing your content.
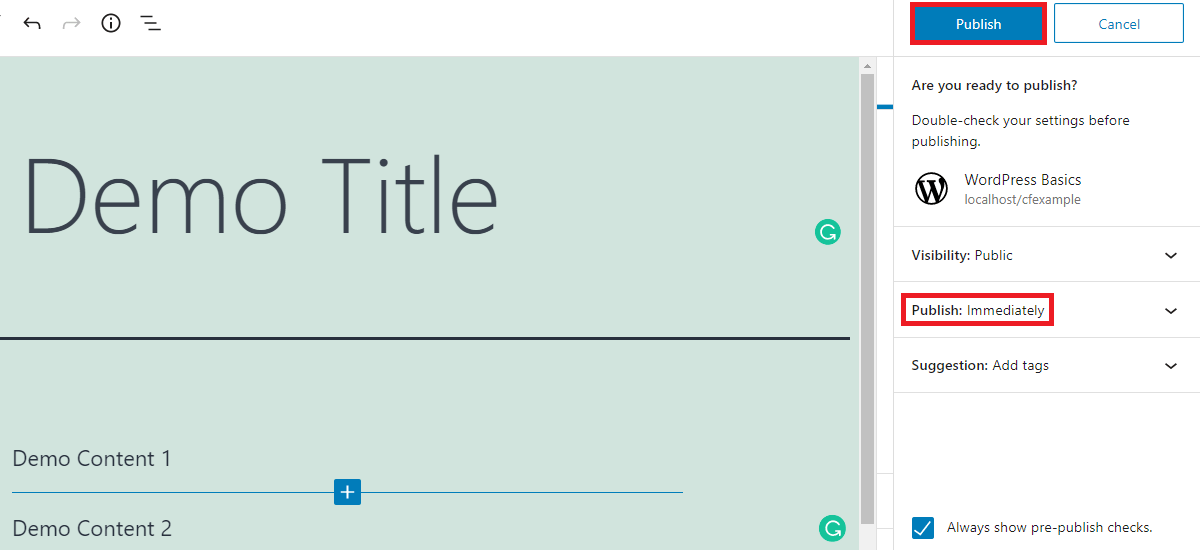
As soon as you click the publish box, you will be asked a confirmation question, “Are you ready to publish?”
Below that you can see the default visibility of the post, you can set that either to the public, private, or password protected. If your content is open to everyone, you will surely want to post it publicly. If your content is sensitive and if you only want the content to be available to admins and editors of the site, you can set the visibility of the post to private.
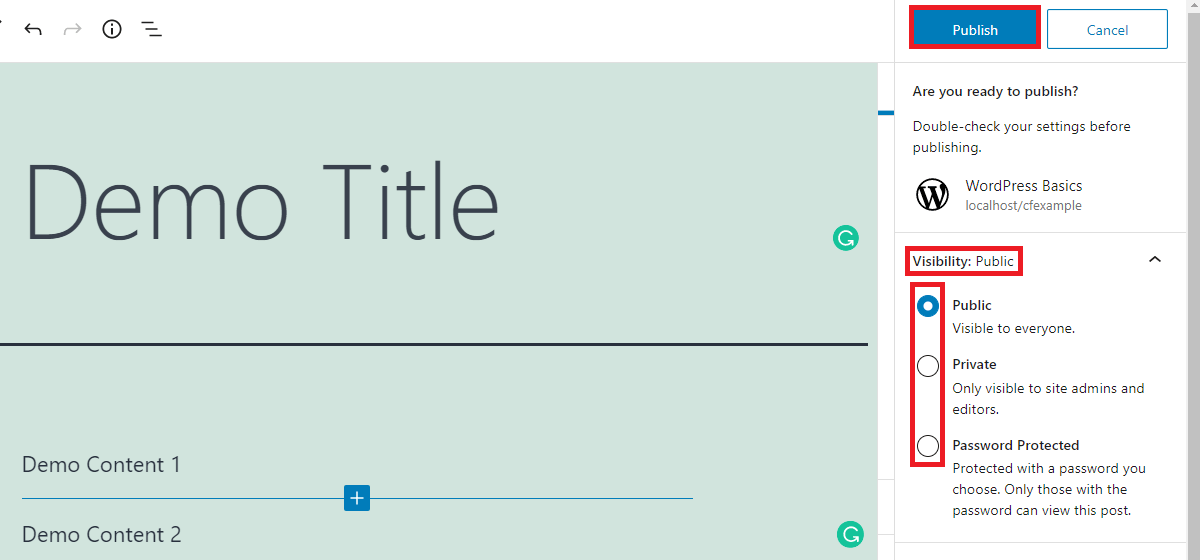
While there is a third option of protecting the post with a password, it means that whenever the URL is opened it will ask for the password. This is useful when you want to select readers for a particular post, provided that you can deliver the password to them.
Below that you will see publish icon. It is set to immediately by default. To complete how to schedule post on WordPress, you need to open this option.
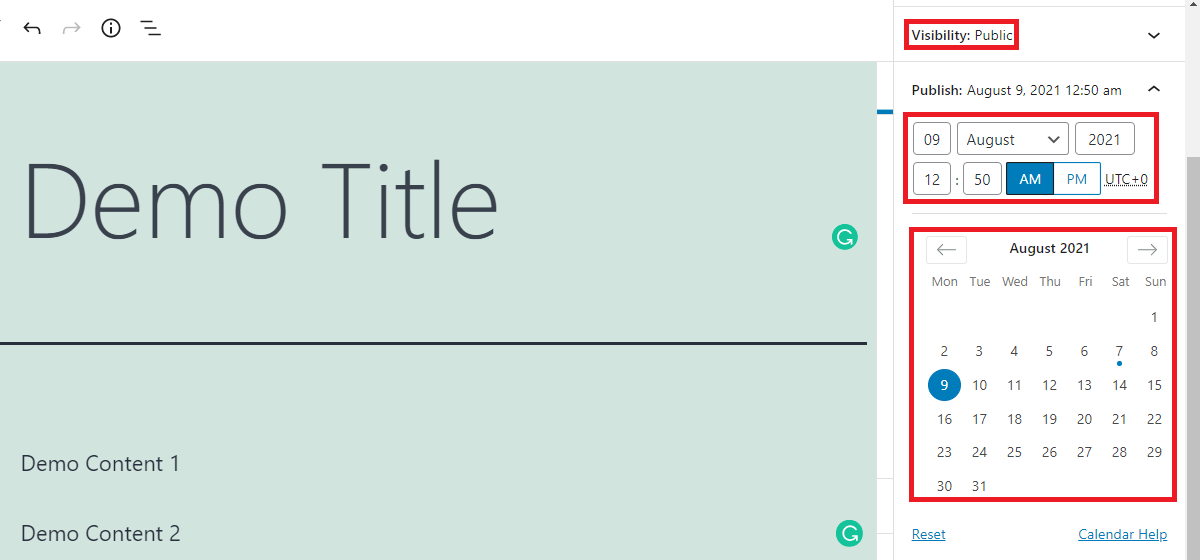
Now you can see that there are boxes where you can keep the date(month, day, year). Obviously, you may not want to post after a year and it is not recommended to schedule for such a long period as well. On a particular date, you can set a specific time of the day.
You can also see the time zone on the right side of the time. By default, it is set to UTC +0 as seen above. However, if this is not your time zone, then you can change it so that it becomes easier for you to set the time.
To continue learning how to schedule post on WordPress, you need to change the timezone. To change the Timezone, open Settings from the dashboard then go to General>Timezone.
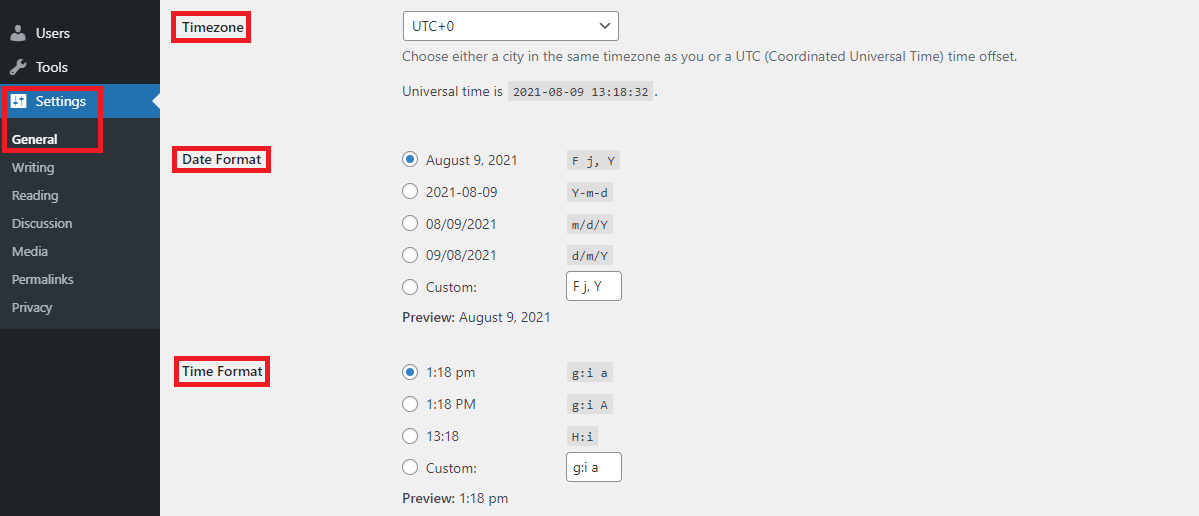
Below the Timezone, you can also change the Date and Time Format. There you can select the required Timezone, Date Format, Time Format and apply the changes. After you apply the changes you can see that the changes will be effective in the post editor as well.
After you set the future date and time, then you will notice that the publish button on the top right side changes to schedule.
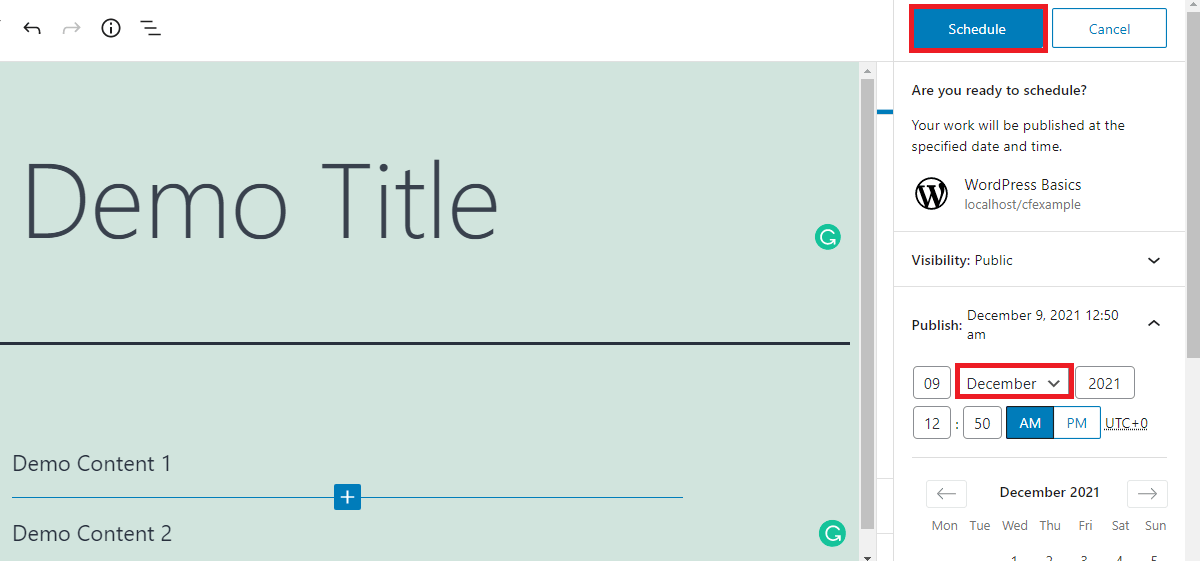
Now you need to click on the Schedule button to schedule your post. WordPress posts the scheduled article on the future date and time automatically. This is comparatively faster than using any plugin for scheduling purposes.
If you keep the past date while scheduling posts, the post will publish at a backdate. It will also include the site in the past archive page.
If there are a lot of scheduled posts on your blog, then you may definitely want to check them to know if you can improve some of them before publishing. To perform this action, Go to Posts>All Posts. You find the Published, Drafts, and Scheduled icon on the top.
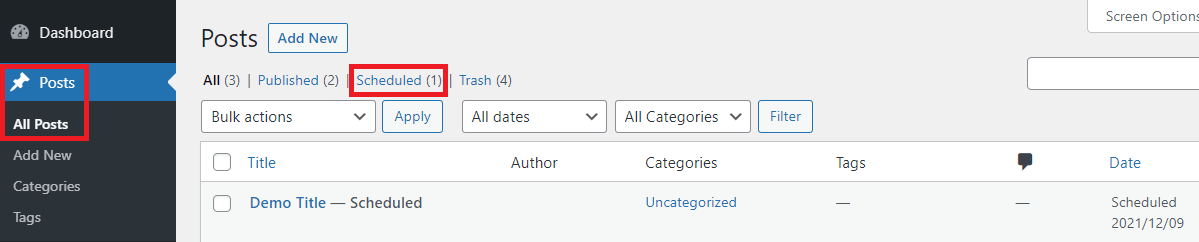
Under Scheduled, there are all the scheduled posts of that particular blog.
WordPress uses WP-Cron to schedule the posts. If there is any misconfiguration in your server or due to any accidental failure, the scheduling of posts may be failed. If it happens, you can check that manually and publish it later again. However, it is not likely to happen. If you want to remove a scheduled post, you can edit that post and save it as a draft and either publish it immediately or later at a suitable time.
Conclusion
This post clearly explains how to schedule post on WordPress. There are only basic things to remember explained well in this post if you are about to start scheduling posts.
Related Posts