If you are looking forward to creating a development site for multiple purposes like testing, then you need to know how to install WordPress on XAMPP Step by Step.
With the help of XAMPP, you can set up a local environment from your own desk. During this period, different sections of the website like blogs, layout, designs can be planned before making the site live.
Overall there are many advantages if you are working locally before publishing the site. Before we start, you need to have an active internet connection so that we can download the latest version of XAMPP and WordPress where we work on.
How to install WordPress on XAMPP Step by Step
Follow these steps to install WordPress on XAMPP:
Download and Install XAMPP
First of all, go to the browser and download XAMPP for your system. XAMPP is available to download for Windows, Linux, and OS X systems.
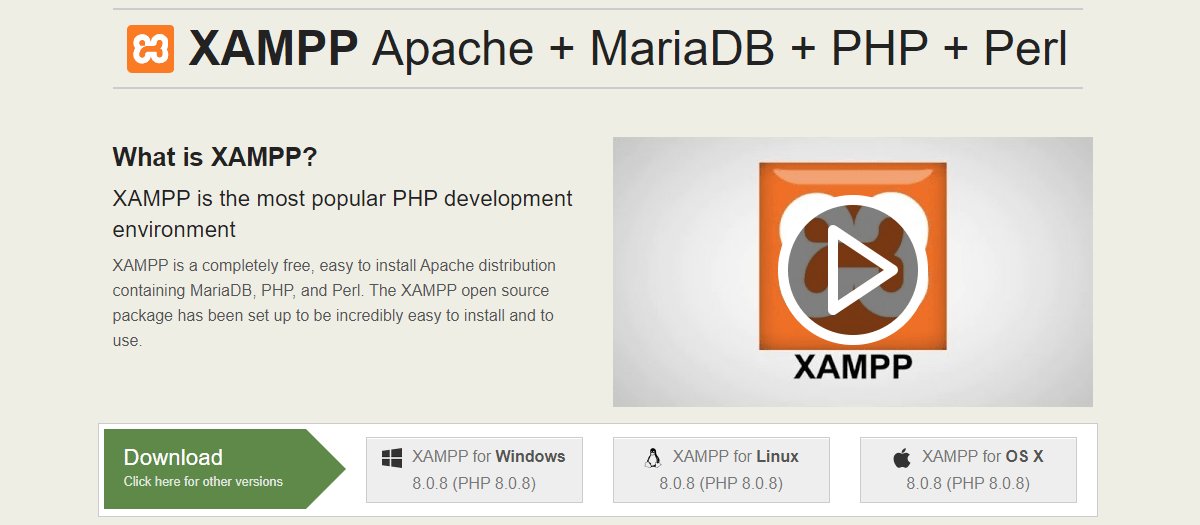
Always download the latest version so that the security patches are updated. After the download is complete, run the installation. It might take few minutes depending on your system. During the installation, you may get a warning from your antivirus software, whatever comes in the way continue the installation process.
Download and Install WordPress
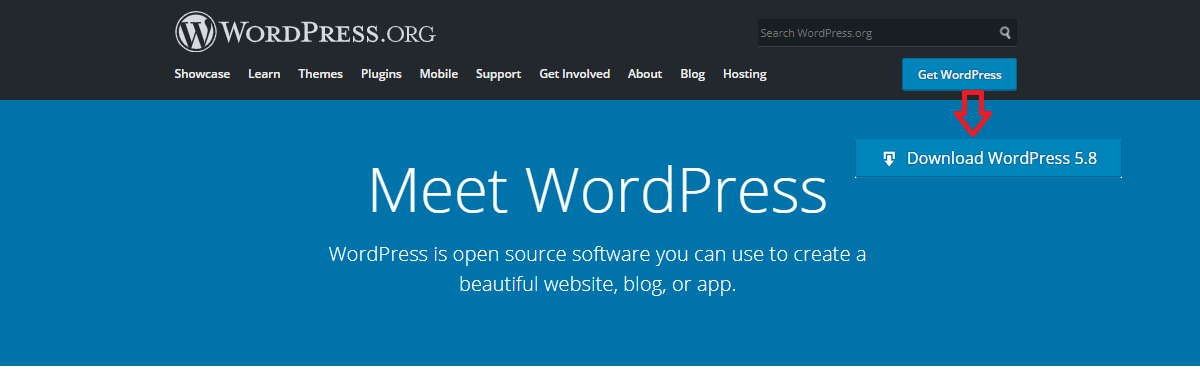
Visit the official site of WordPress to download the latest version.
The downloaded file of WordPress is in a zip file. Extract that file to a new folder, and select all those files and copy them. You need to post these files in a certain location inside the XAMPP folder. If you have installed XAMPP in G: then you need to paste these files in G:\xampp\htdocs\New Folder Name\(Paste your earlier copied WordPress Files here)
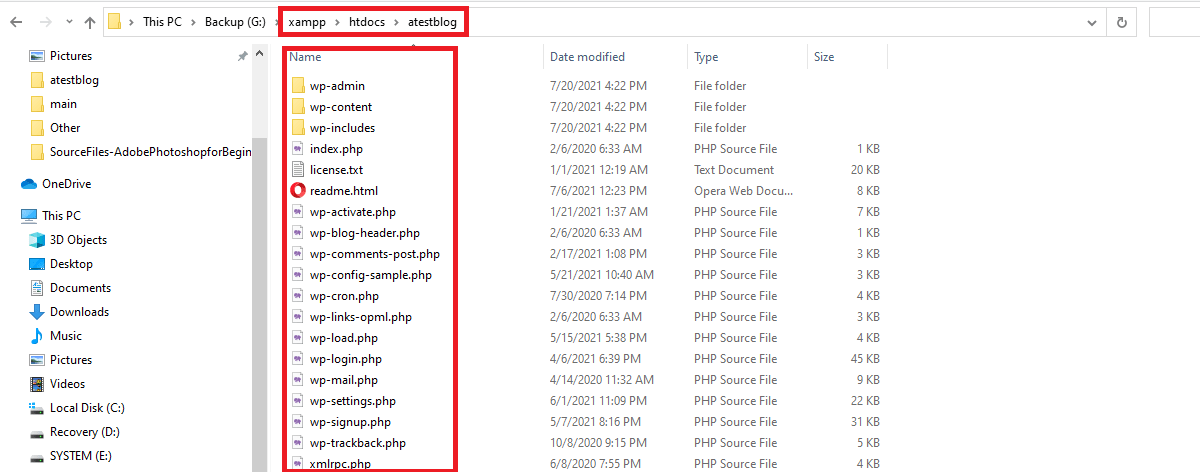
Note: The new folder name should be kept in accordance with the new site title. In our case, the folder name is atestblog.
Start XAMPP Server
To open the XAMPP server, Go to the start menu and type XAMPP. You will see the XAMPP control panel on the screen.
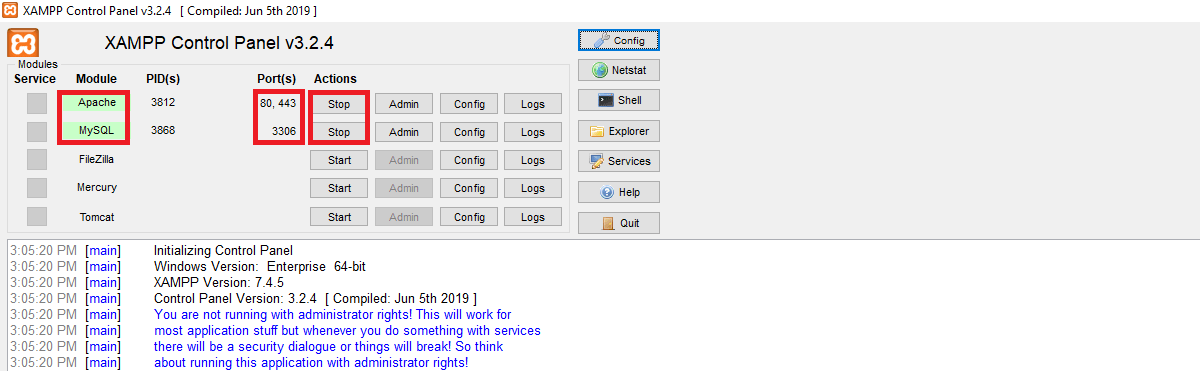
You need to start Apache and MySQL by clicking start in the corresponding row in the Actions column.
Apache runs on port 80,443
MySQL runs on port 3306
Now if you type localhost in the browser, if Apache is running you will be able to see the XAMPP page. If it opens then you should note that Apache is installed successfully to process PHP files.
Also, if you type localhost/phpmyadmin in the browser if you see a web-based client application to interact with MySQL. This confirms that MySQL is running.
Sometimes you may also face a problem while running these ports. If it happens, you need to check the log at the bottom and act accordingly. The log is provided with the red text and there is no single reason for failure so you can check its solution depending on the failure message. Personally, I haven’t encountered that on my machine and hope you won’t face that either. If you ever face it, give me a shoutout at amar@codeflist.com, I will be happy to help you out.
After it is done, you will be able to run a site locally without the need for a domain name and hosting server. You should do this every time whenever you restart your machine. At the end of the post, we will provide you a bonus tip that will remove the need to start the services Apache and MySQL after every restart. That means these two services will be started automatically whenever your machine starts. That will definitely save some of your developing time.
Create WordPress Database
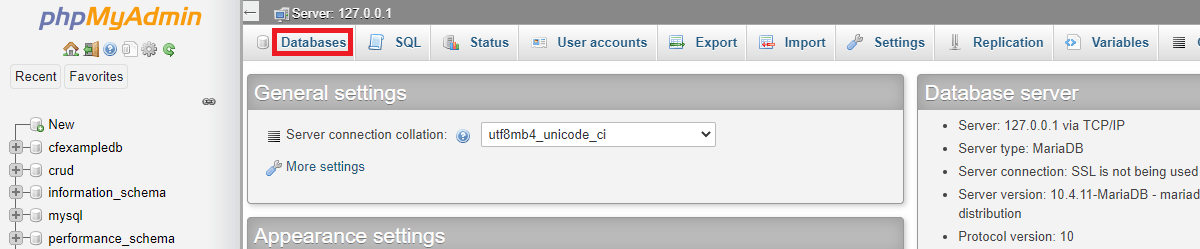
You need a MySQL Database to install WordPress. To continue the process, open localhost/phpmyadmin/
Click the Databases as shown below:
It is recommended to keep the database name the same as you have written before in the new folder name i.e. your site title. In the second box, you can either change it to Collation or leave it as it is and click Create.

Install WordPress Locally
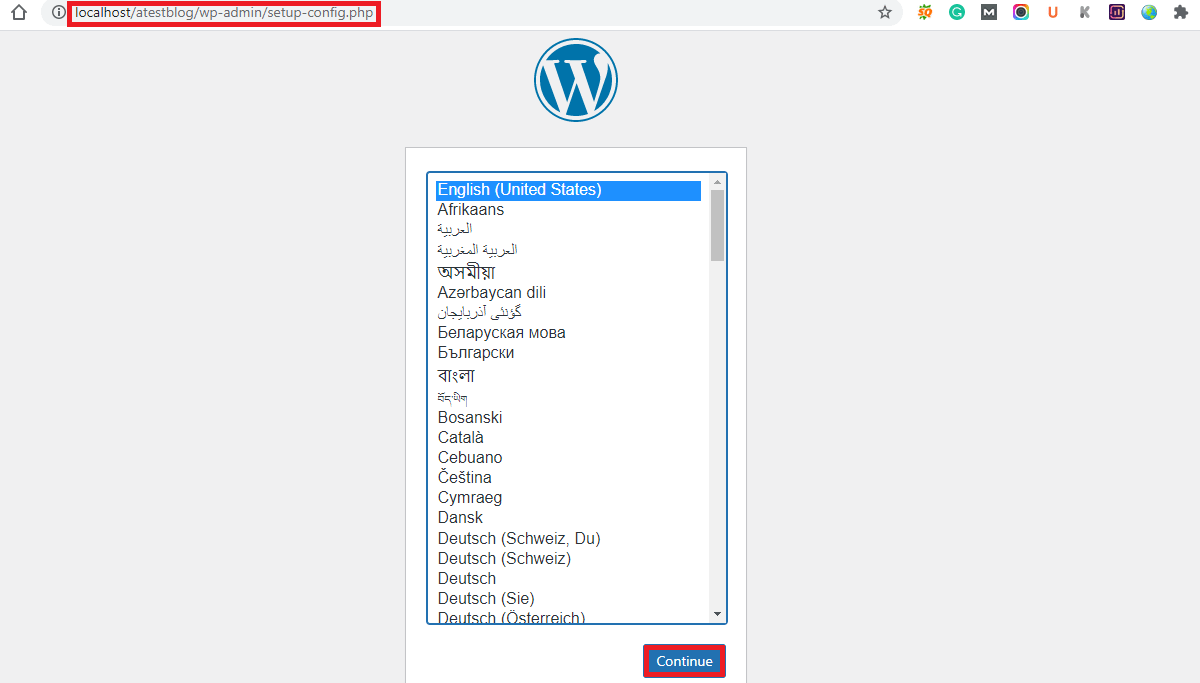
If all the above steps are done then you should be able to see the WordPress installer screen when you open the URL localhost/yourfoldername
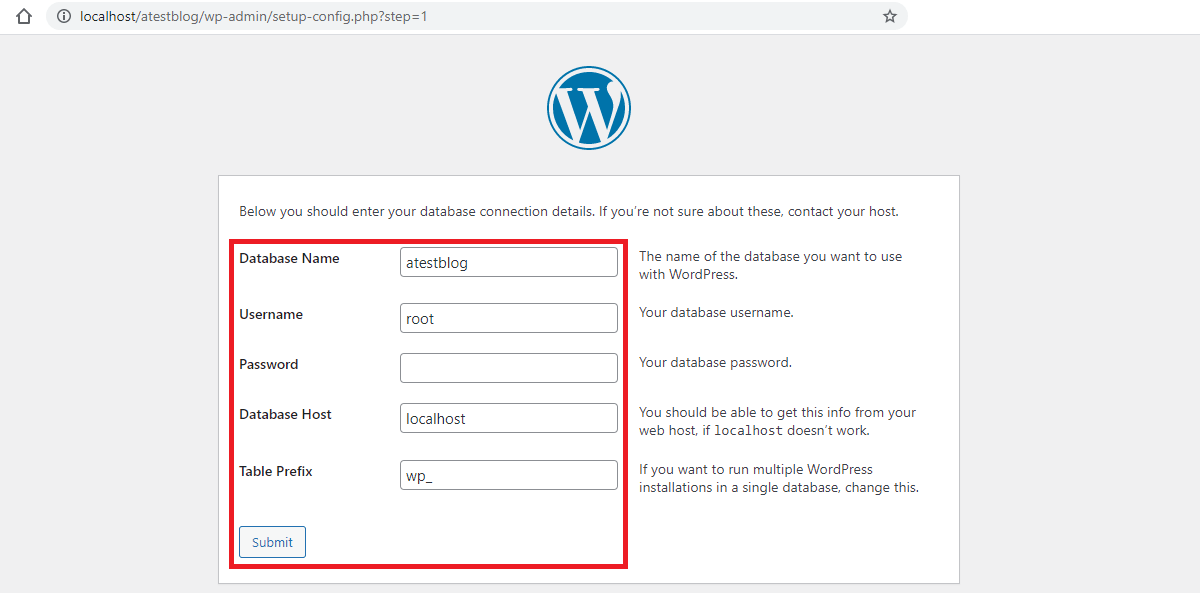
While installing you need to keep the same database name that you created in the earlier step.
The username is root for localhost and leave the password field empty.
Database Host and Table Prefix should be as it is.
Fill in the Site Title as you wish to be.
The username is generally kept as admin.
Type password manually. You can also keep a weak password by clicking on the icon “Confirm use of weak password“.
The email address is needed.
Leave Search engine visibility as it is. i.e. leave it unchecked.
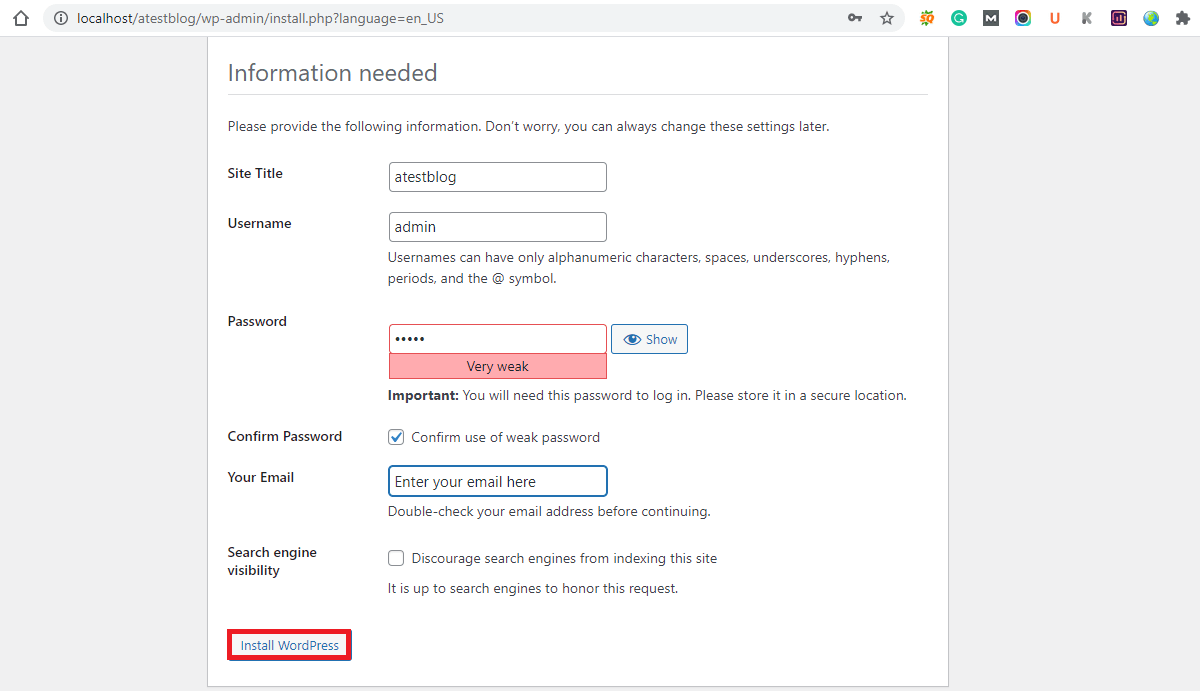
Now you may install WordPress and login into the next step.
Do not forget the username and password as you need them to log in to your newly created dashboard.
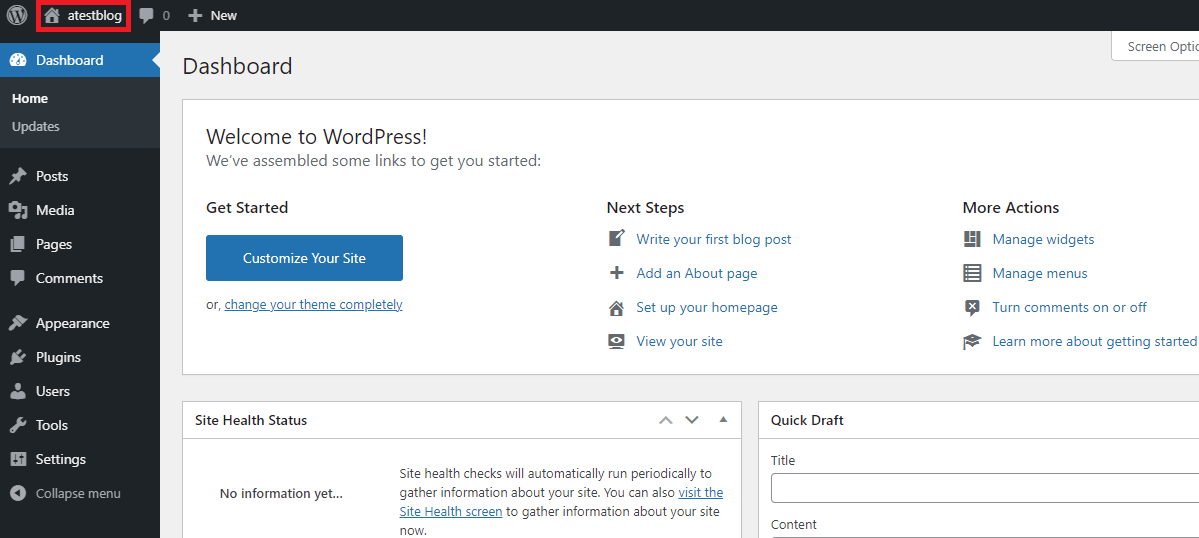
On the top left, you will see the site title. You can open it in a new tab to check the site after you make some changes.
The Dashboard section shows the various aspects of your site along with the WordPress Events and News.
New blogs and articles can be posted from the Posts section.
In the media, you will be able to upload the media files like videos, images, etc.
You will be able to add or edit multiple pages from the Pages tab.
The themes can be added from the Appearance tab while Plugins can be added from the plugins tab. By default, there are some themes and plugins in the WordPress installation.
You can manage different users to the site from the Users tab. There are other options in the Tools and Settings tab that you may want to explore as well.
Bonus Tip
As we have mentioned above, we will let you know the way to start the services Apache and MySQL automatically whenever your machine is on.
To make the Apache and MySQL run as services, first go to the folder where XAMPP is installed. Find xampp-control.exe inside the XAMPP folder. Right-click this file and run as an administrator.
You will see the Modules service in the first column with a red cross mark on Apache and MySQL. Change the Red Mark to Green Tick Mark on both these services. Now go to config and check Apache and MySQL in the Autostart of modules. Save these changes.
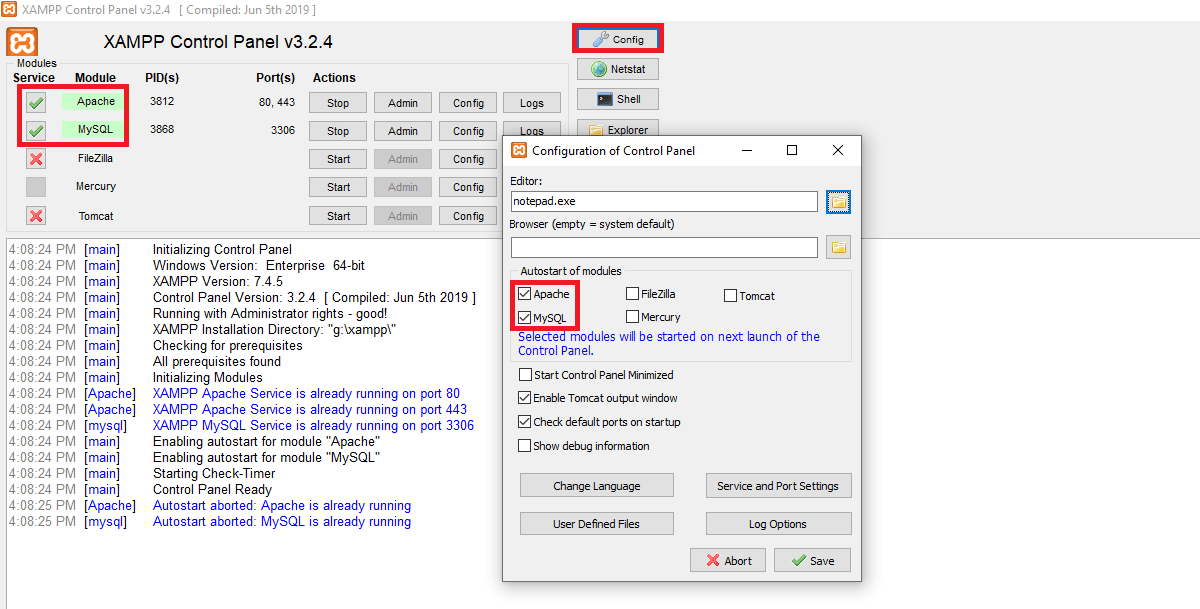
After doing these changes, whenever you restart your machine, Apache and MySQL will be started automatically.
Wrapping Up
If you have followed this post, you definitely learned how to install WordPress on XAMPP Step by Step. With the help of the localhost, you can take your time to design a site before publishing it online. After you finish with this process, you can buy a domain and hosting to continue further.
Our Other Articles