
Unzip smart-product-review-lite.zip
Upload all the files to the /wp-content/plugins/smart-product-review-lite.
Activate the plugin through the ‘Plugins’ menu in WordPress.
For customizing the plugin’s settings, click on Smart Product Review Lite For WooCommerce option menu in WordPress left admin menu.
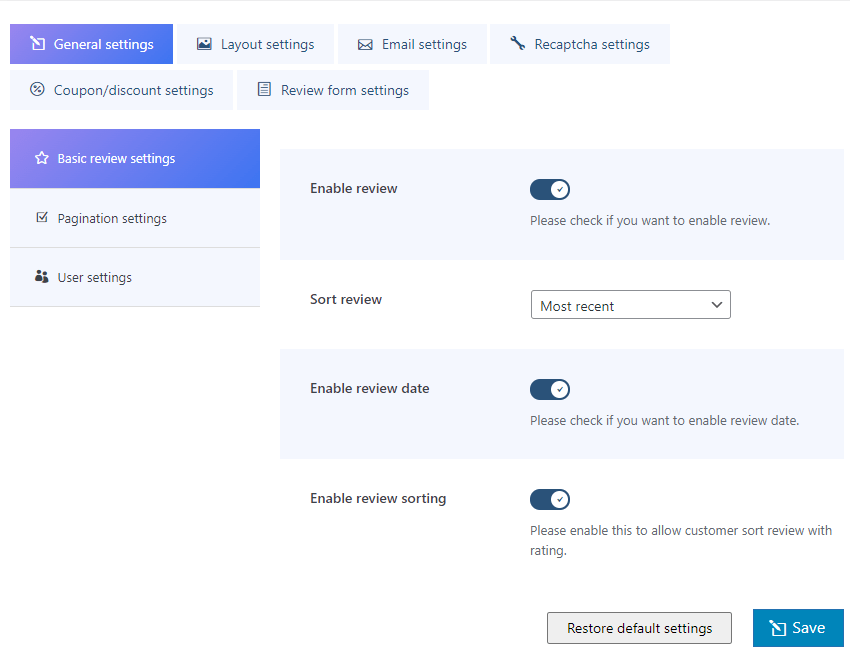
This is the setting configuration page for the plugin. From here you can manage the settings for product reviews. It contains General Settings, Layout Settings, Email Settings, Recaptcha Settings, Coupon/Discount Settings and Review Form Settings. You can manage the overall settings from here.
The general settings of the plugin include the basic settings needed to setup the review for the product. It has divided the settings into Basic Review Settings, Pagination Settings, User Settings.
Each of the settings has been described below in detail:
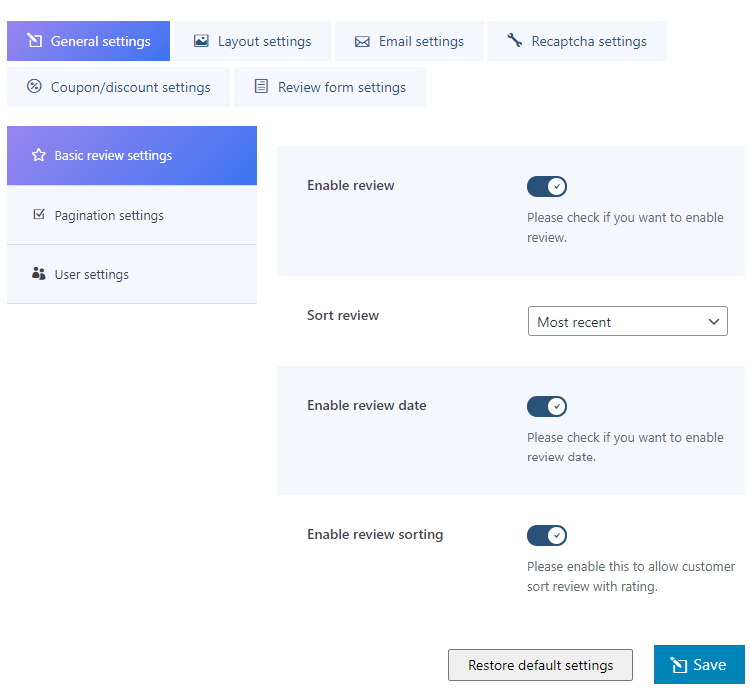
It includes the following settings:
- Enable Review: Enable this to show review forms and reviews on the product page.
- Sort Review: This setting is used for sorting the listed reviews on the product page. It includes most recent, rating high to low and rating low to high.
- Enable Review Date: This settings is used to enable or disable the review date in the frontend.
- Enable review sorting: This setting is used to enable or disable the review sorting options on reviews.
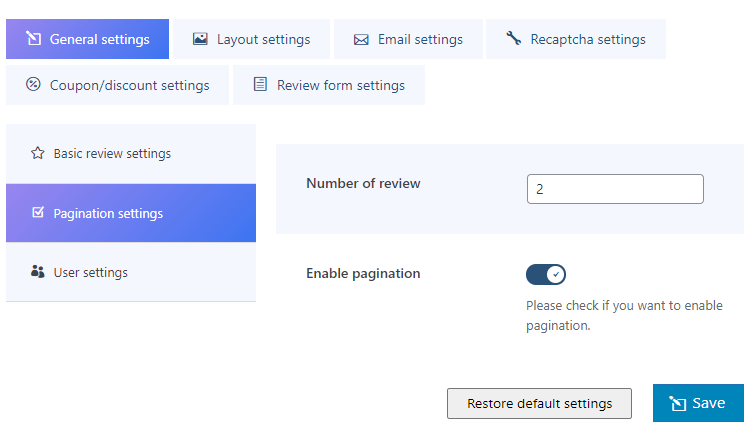
This setting is used to control the number of reviews and pagination:
- Number of Review: This setting is used to show the number of reviews on the frontend.
- Enable Pagination: This setting is used to enable the pagination in the frontend.
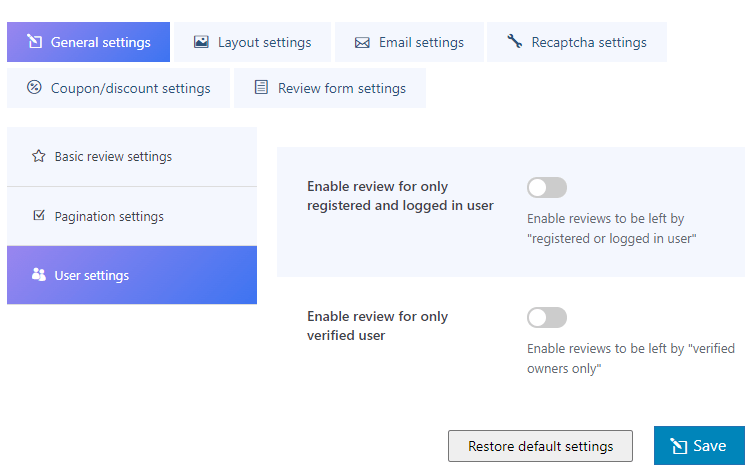
This settings is to select the user for reviews. It includes the following settings:
- Enable review for only registered and logged in user: Enable this option to allow the review to only registered and logged in user.
- Enable review for only verified user: Enable this option to allow the review to only purchase verified users.
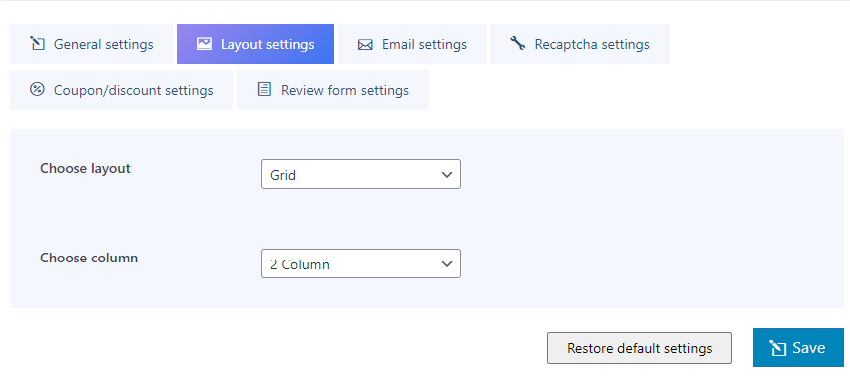
This is used to set up the layout template of the reviews. It includes the following fields.
- Choose Layout: Choose the required layout from this setting. It has 2 different layouts grid and list.
- Choose Column: If the grid layout has been selected then this setting will appear. This is used to enter the number of columns of the grid in the reviews.
The email settings is used to setup a review notification email to the user after purchase and an admin notification email to the admin about the reviews moderation. It includes admin notification settings, review notification settings and other settings which are described below in detail.
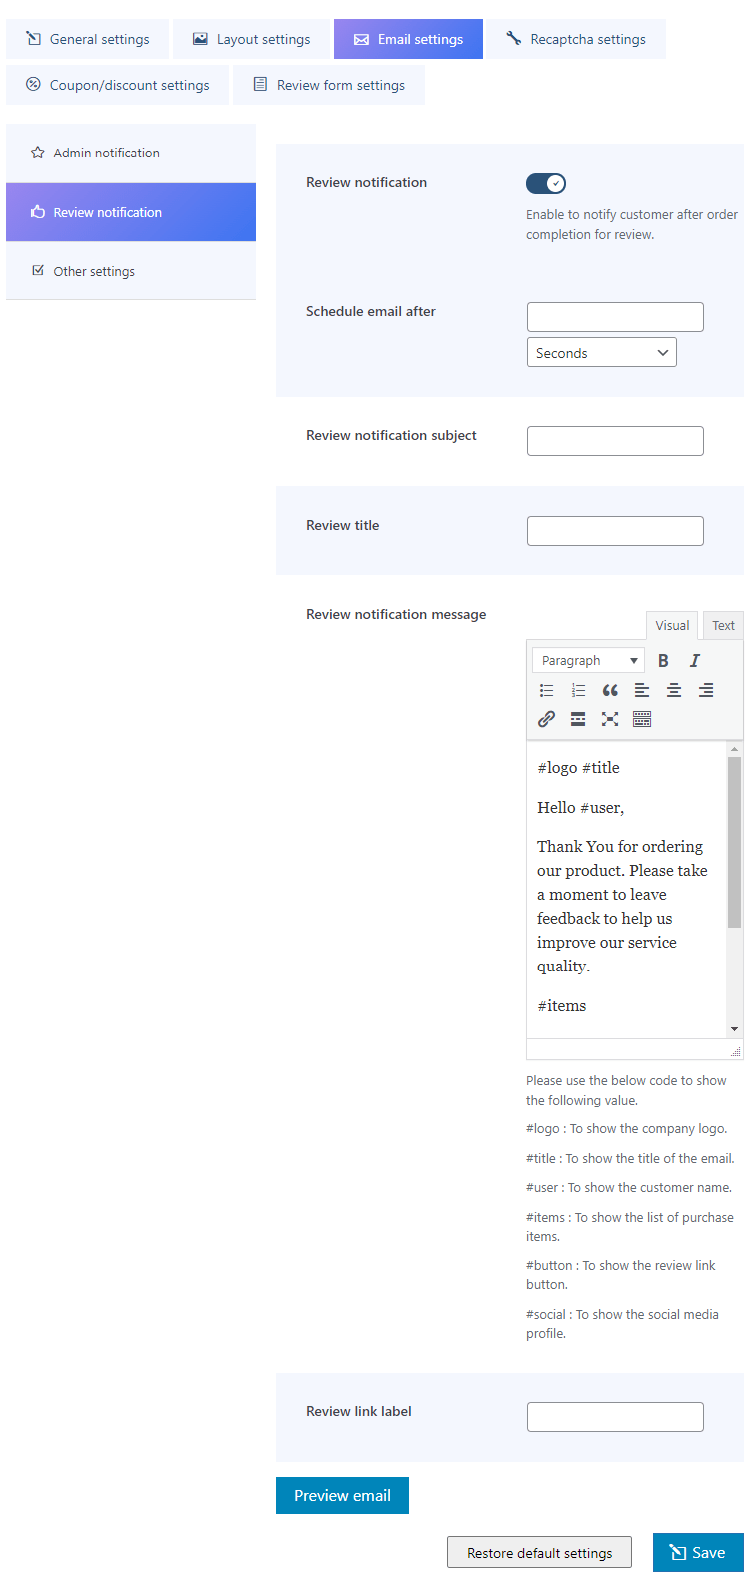
This admin notification settings include the settings of the email for sending the details of review to the admin after the customer review any product. It has a preview button for checking the preview sample of the email of current settings of admin notifications. It includes the following settings:
- Admin notification: Enable this to send a notification to the site admin after each review.
- Admin notification subject: This setting is used to enter the subject of the email to send the review details to the admin.
- Admin notification title: This setting is used to enter the admin notification title of the email.
- Admin notification message: This settings is used to enter the email message to the admin about the reviews. Please use the below code to show the following value.
#logo: To show the company logo.
#title: To show the title of the email.
#admin: To show the admin name.
#producttitle: To show the name of the product.
#review_details: To show the details of the review.
#review_action_buttons: To show the action buttons of the review. - Admin email: This setting is used to enter the email of the receiver where the product review details will be sent.
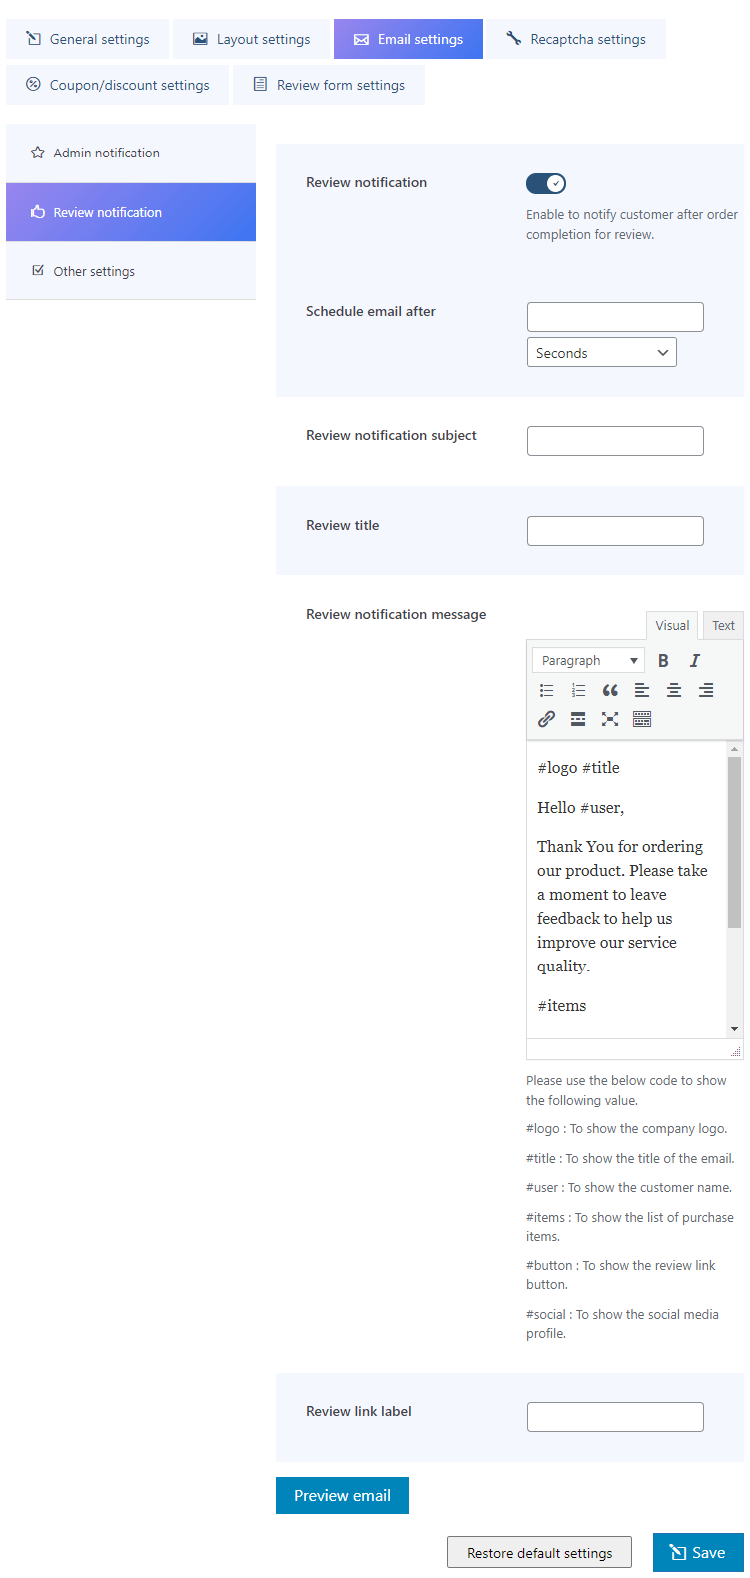
This setting is used to send the review email to the customer after ordering and purchasing an item. It includes the following settings:
- Review Notification: Enable to notify customer after order completion for review.
- Schedule Email After: This setting is used to set the time for the email to be sent.
- Review notification subject: This setting is used to enter the subject of the email.
- Review Title: This setting is used to enter the title of the email.
- Review notification message: This setting is used to enter the message of the email. Please use the below code to show the following value. #logo: To show the company logo. #title: To show the title of the email. #user: To show the customer name. #items: To show the list of purchase items. #button: To show the review link button. #social: To show the social media profile.
- Review Link Label: This setting is used for the review link label.
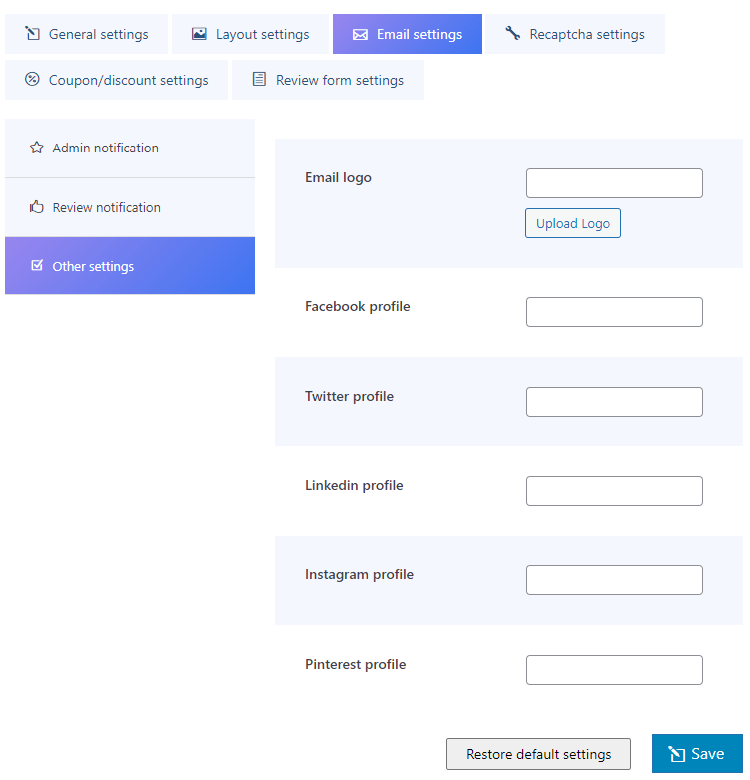
This includes the social medias and logo settings that are included in the email. It includes the following settings:
- Email Logo: Upload the logo of the company to show in the email.
- Facebook Profile: This setting is used to enter the Facebook profile link to show in the email for contact.
- Twitter Profile: This setting is used to enter the Twitter profile link to show in the email for contact.
- Linkedin Profile: This setting is used to enter the LinkedIn profile link to show in the email for contact.
- Instagram Profile: This setting is used to enter the Instagram profile link to show in the email for contact.
- Pinterest Profile: This setting is used to enter the Pinterest profile link to show in the email for contact.
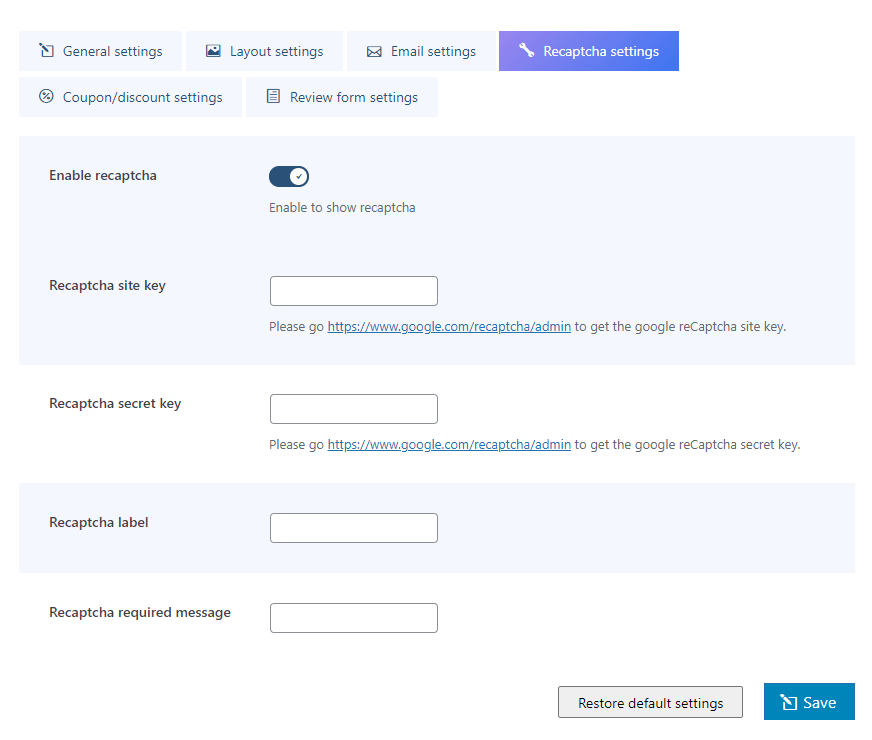
This is used to set up the general settings for the product.
- Enable Recaptcha: Enable the Recaptcha to avoid spam review.
- Recaptcha Site Key: Enter the Recaptcha site key to activate the Recaptcha. Please go https://www.google.com/recaptcha/admin to get the google reCaptcha site key.
- Recaptcha Secret Key: Enter the Recaptcha secret key to activate the Recaptcha. Please go https://www.google.com/recaptcha/admin to get the google reCaptcha secret key.
- Recaptcha Label: Enter the Recaptcha label to show in the review form.
- Recaptcha Required Message: Enter the Recaptcha required message for validation.
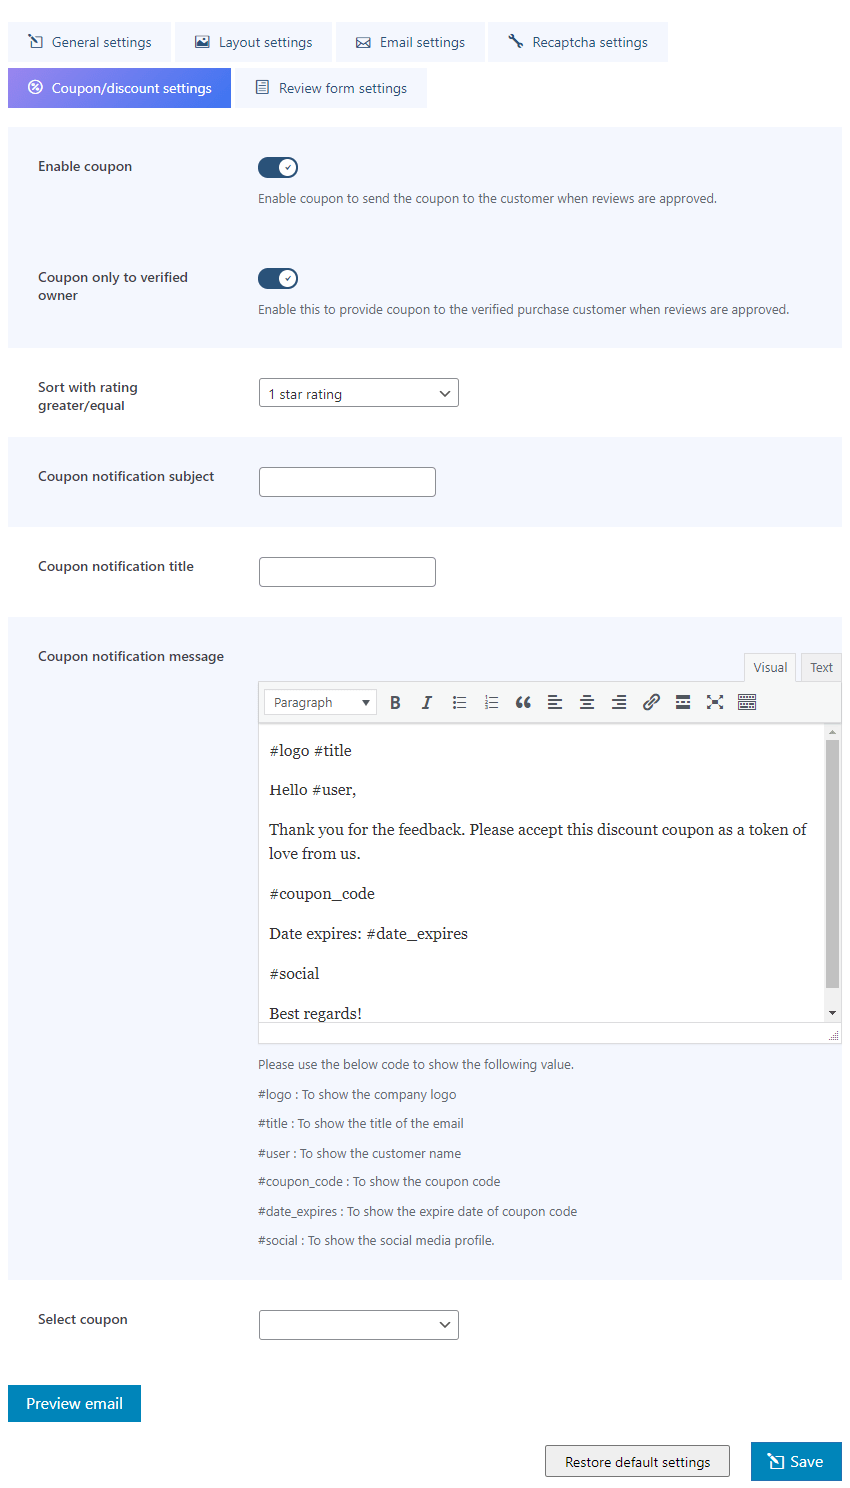
The coupon/discount settings are used for sending the thank you email with a coupon to the reviewer who has purchased the items. It includes the following settings:
- Enable Coupon: Enable this setting to send the email to the reviewer for sending the coupon thankyou email.
- Coupon only to verified owner: Enable this setting to allow coupon email to only verified buyers.
- Sort With Rating Greater/Equal: This setting is used to send email to only the selected rating over here.
- Coupon Notification Subject: This setting is used to enter the notification subject of the email.
- Coupon Notification Title: This setting is used to enter the notification title of the email.
- Coupon Notification Message: This setting is used to enter the notification message of the email.Please use the below code to show the following value.
#logo: To show the company logo.
#title: To show the title of the email.
#user: To show the customer name.
#coupon_code: To show the coupon code.
#date_expires: To show the expiration date of coupon code.
#social: To show the social media profile. - Select Coupon: This setting is used to select the coupon for the email.
The review form settings include the following settings:
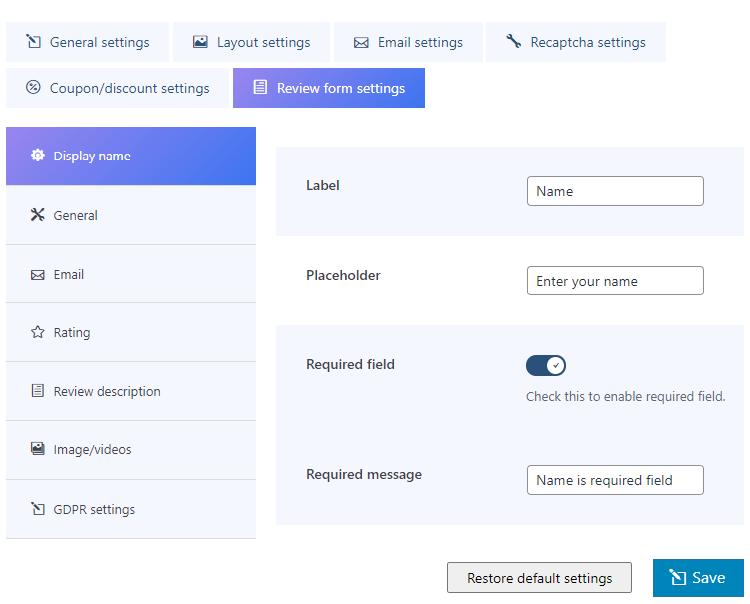
The setting is used for showing the name of the reviewer on the form. It includes the following settings:
- Label: This setting is used to enter the label of the name field in the form.
- Placeholder: This setting is used to enter the placeholder for the name field in the form.
- Required Field: Enable this setting to make it the required field in the review form.
- Required Message: This setting is used to enter the required message for the name in the form.
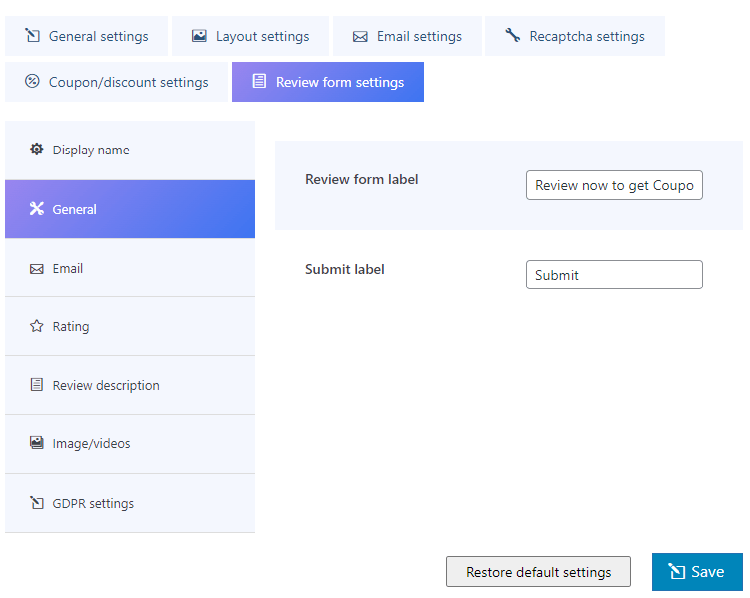
It includes the general label settings in the form which are described below:
- Review Form Label: This setting is used to enter the title of the review form.
- Submit Label: This setting is used to enter the submit label of the form.
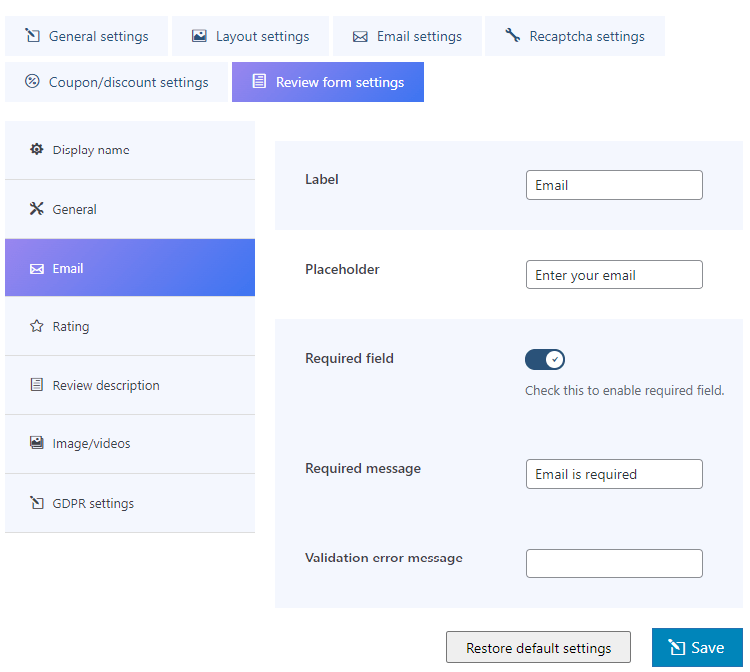
It includes the following settings:
- Label: This setting is used to enter the label of the email field in the form.
- Placeholder: This setting is used to enter the placeholder for the email field in the form.
- Required Field: Enable this setting to make it the required field in the review form.
- Required Message: This settings is used to enter the required message for the email in the form.
- Validation Error Message: This setting is used to enter the message for the validation error of email.
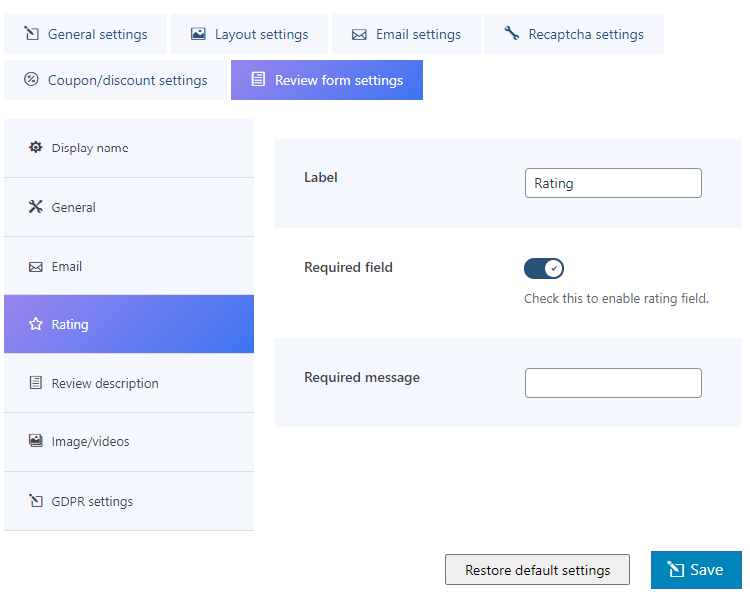
It includes the following settings:
- Label: This setting is used to enter the label of the rating field in the form.
- Required Field: Enable this settings to make it the required field in the review form.
- Required Message: This setting is used to enter the required message for a rating in the form.
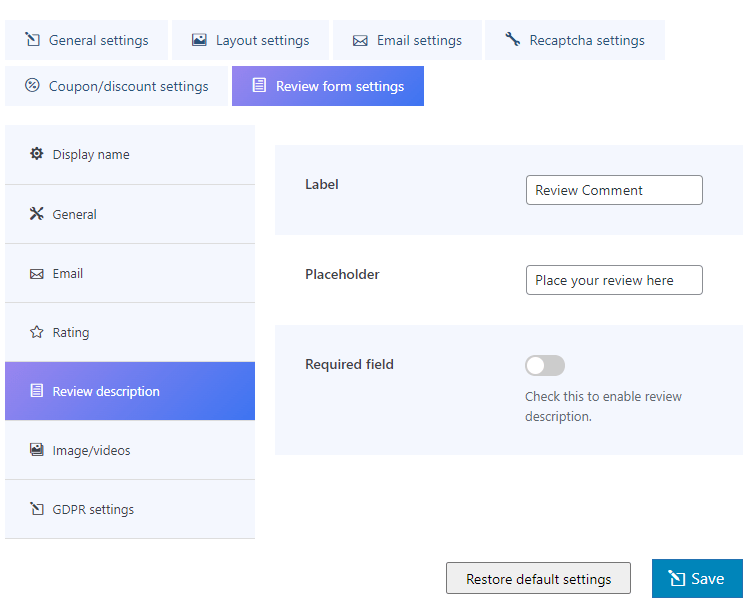
It includes the following settings:
- Label: This setting is used to enter the label of the review comment field in the form.
- Placeholder: This setting is used to enter the placeholder for the review comment field in the form.
- Required Field: Enable this setting to make it the required field in the review form.
- Required Message: This setting is used to enter the required message for review comment in the form.
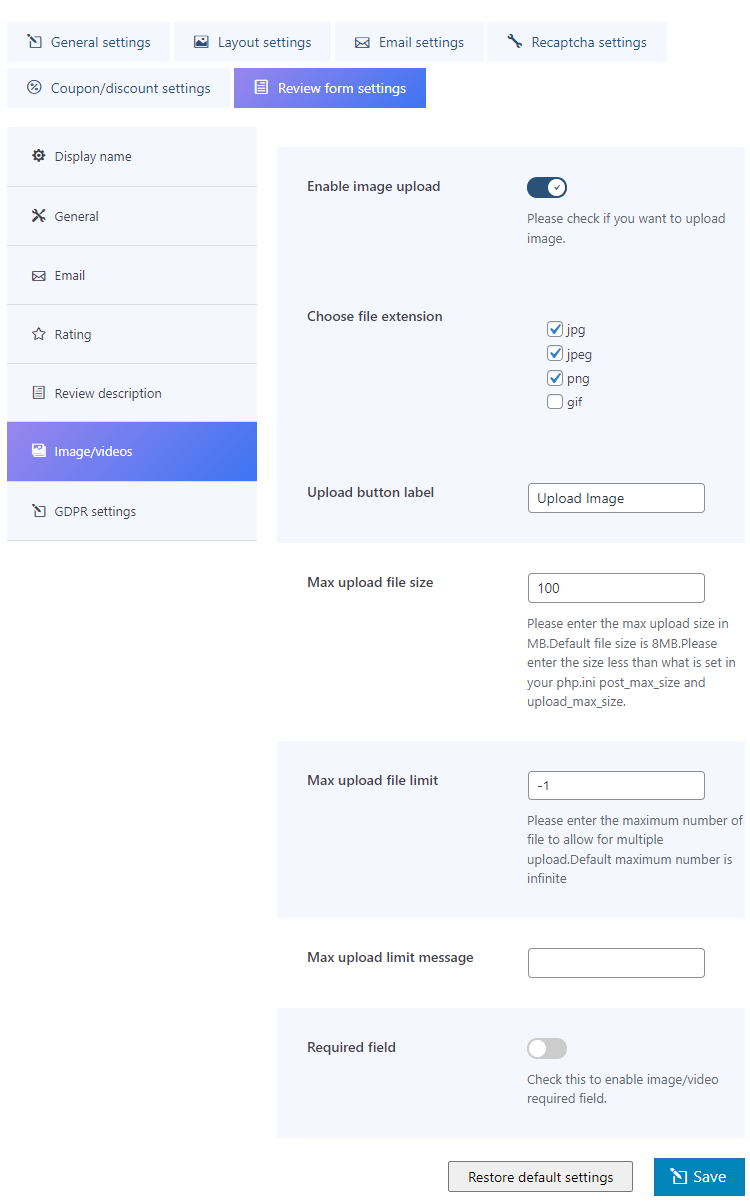
It includes the following settings:
- Enable image upload: Enable this setting to allow image upload in the review form.
- Choose File Extension: Choose the required file extension for the image.
- Upload Button Label: This setting is used to enter the label for the upload button.
- Max Upload File Size: This setting is used to enter the maximum upload file size for images.
- Max Upload File Limit: This setting is used to enter the maximum upload file limit for images and videos.
- Max Upload Limit Message: This setting is used to enter the maximum upload limit message error.
- Required Field: Enable this setting to make it the required field in the review form.
- Required Message: This setting is used to enter the required message for images/videos in the form.
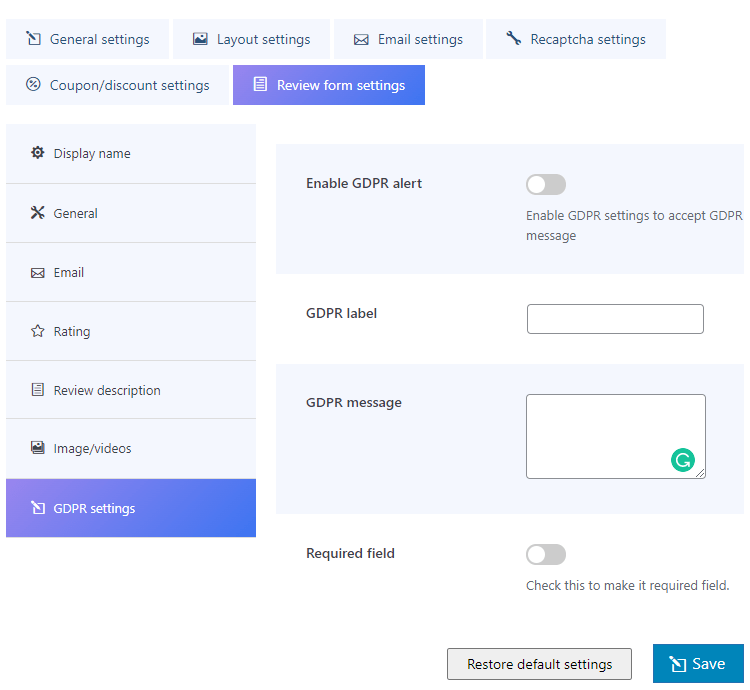
It includes the following settings:
- Enable GDPR Alert: Enable this setting to show GDPR alert in the form.
- GDPR Label: This is used to enter the GDPR Label in the form.
- GDPR Message: This is used to enter the GDPR Message in the form.
- Required Field: Enable this setting to make it the required field in the review form.
- Required Message: This setting is used to enter the required message for GDPR in the form.